
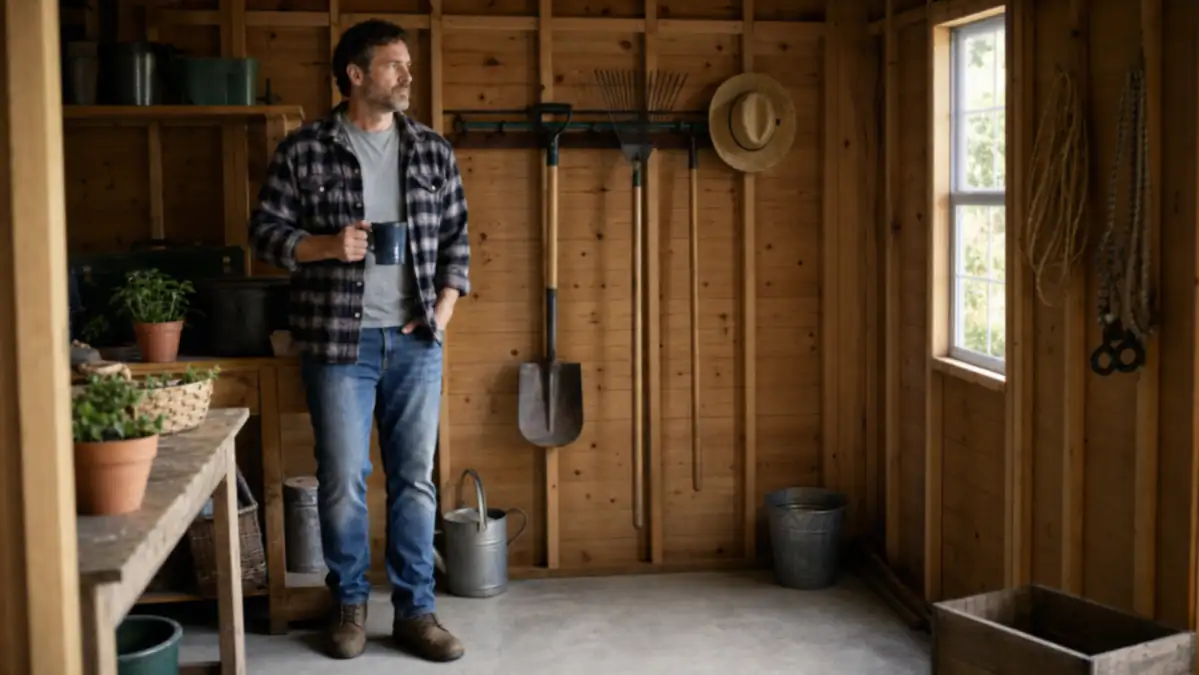
My shed is eight by ten feet, and for about three years it functioned less like storage and more like a place where garden tools went to be forgotten. A shovel leaned against a rake, which leaned against a hoe, and somewhere behind all of it was a hand trowel I hadn't seen since spring. I got into the habit of just walking past the shed and grabbing whatever I needed from the garage instead, which meant the garage started filling up too, and the shed sat there doing nothing but holding a pile.
What finally fixed it wasn't a bigger shed. It was getting everything up off the floor and onto the wall, using a wall-mount tool rack instead of leaning tools in a corner and hoping for the best. That single change turned a shed I avoided into one I actually walk into without stepping over anything. Here is the process I used, start to finish, including the two things I'd tell anyone before they pick up a drill: how to find your studs, and how to keep anything bladed or powered out of reach of kids.
The rack that made this whole project stick
A tool organizer is only as good as what it can actually hold without sagging or pulling loose after a season. The StoreYourBoard 36 inch garage tool organizer is rated to hold up to 250 pounds across its rubber coated hooks, which is more than enough headroom for a full set of long-handled garden tools plus a few smaller pieces, and the rubber coating keeps steel shafts from rattling or scratching against bare metal.
Amazon Check Today's Price on Amazon →Step 1: Pull everything out and sort it into three piles
Before you mount anything, empty the shed completely. I know that sounds like more work than just working around what's already in there, but you cannot plan a layout for a space you can't actually see the walls of, and half the point of this project is finding out what you own. Drag everything out onto the lawn or driveway on a dry day and sort it into three rough piles: tools you use weekly, tools you use a few times a season, and tools you haven't touched in over a year and honestly might not need.
That third pile is usually bigger than people expect. I found a broken-handled hoe I'd been meaning to fix for two seasons and a bag of stakes for a trellis system I stopped using years ago. Be honest with that pile. A wall-mount rack only helps if you're not trying to cram everything you've ever owned onto it, and a shed that's been cleared out once tends to stay easier to keep organized going forward.
Whatever ends up in that leftover pile, deal with it before anything goes back inside, not after. Broken tools with a handle worth saving get set aside for a repair I'll actually get to, duplicates I'm never going to use twice go to a neighbor or a donation bin, and anything genuinely worn out goes straight to the curb. I used to shove that pile back into a corner and tell myself I'd sort it later, and later never came, so the corner just filled up again by the following season. Getting rid of it once, up front, is what keeps a cleared shed from slowly turning back into a cluttered one.
Step 2: Find your studs before you plan the layout
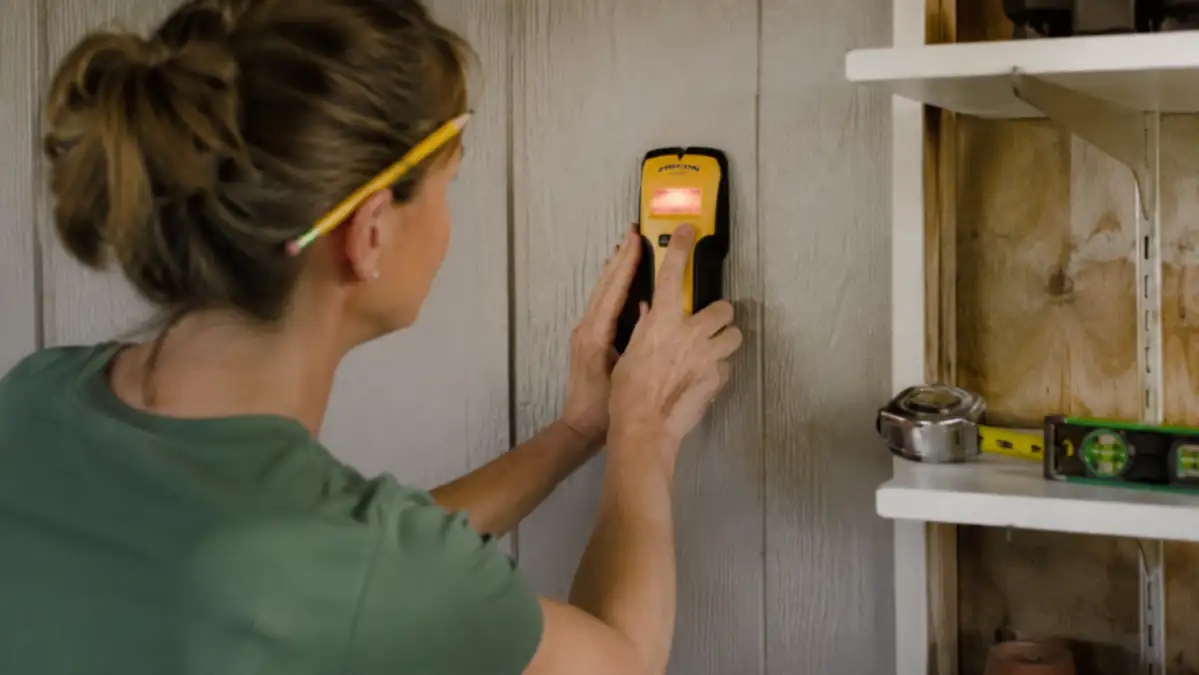
This is the step that gets skipped most often, and it's the one that determines whether your tool rack is still on the wall a year from now or sitting on the floor after the first time you loaded it up with a full wheelbarrow's worth of tools. Most small sheds are built with wall studs spaced sixteen or twenty-four inches apart, either wood framing behind thin paneling or, on a metal shed, vertical ribs in the panel itself. Run a stud finder along the wall at the height you're planning to mount, mark each stud lightly in pencil, and confirm with a small test screw before you commit to your final hole pattern.
If you can't find studs where you want the rack, or your shed walls are thin OSB or metal panel without solid backing behind them, don't just drive screws into the panel and hope. Toggle bolts or metal-shed-rated anchors rated for the actual weight you plan to hang will hold far better than wood screws sunk into hollow paneling, and they're worth the extra ten minutes at the hardware store. A rack that's only anchored into thin panel can pull loose the first time it's fully loaded, and it usually happens while nobody's watching, so you find your whole rack and everything on it on the floor the next time you open the door.
Don't overload whatever anchoring you end up with, even a well-anchored rack. Rated weight limits assume the load is distributed across the hooks evenly and that the mounting points are solid. Piling every heavy tool you own onto one end of the rack, or hanging something well past what the rack is rated for, is how even a good tool organizer eventually fails. Spread the weight out and respect the rating on the packaging.
Measure the wall before you buy anything, not just the studs but the total run of open wall you actually have to work with once you account for a window, a light switch, or a shelf that's already mounted. A thirty-six inch rack sounds like it will fit almost anywhere until you get out there with a tape measure and realize the usable stretch between the door frame and the corner is closer to thirty inches. I've made that mistake once already on a different project, and it's a lot easier to measure twice than to remount a rack after the fact.
Step 3: Plan your layout by reach and frequency, not by tool type
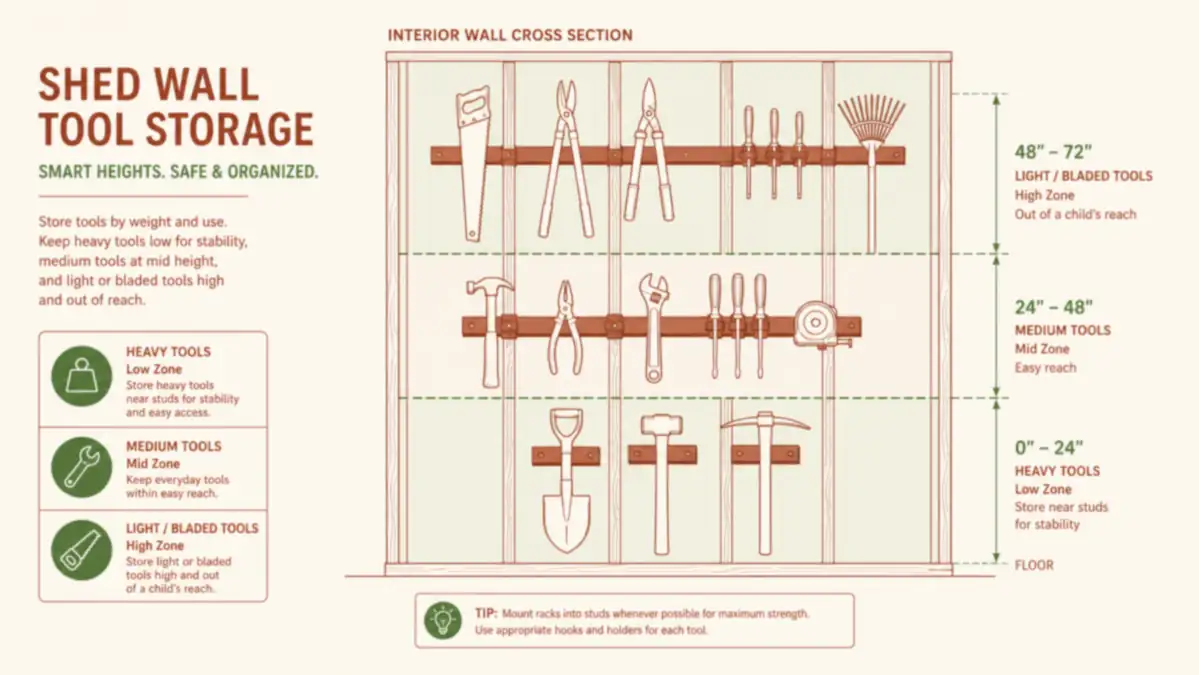
It's tempting to group tools by category, all the digging tools together, all the cutting tools together, but the layout that actually works day to day is based on how often you reach for something and how tall you are. Your weekly tools, the rake, the hoe, the hand pruner you use every time you're out there, should hang at a height you can grab without stretching or crouching, roughly between shoulder and hip height. Tools you use less often can go higher or lower, since a little extra reach doesn't matter much for something you touch twice a season.
Leave real gaps between hooks. I made the mistake the first time around of spacing everything as tight as the rack would allow, and long-handled tools with wide heads, a rake in particular, ended up overlapping and knocking into each other every time I pulled one off. Give yourself at least a few inches of breathing room per tool, even if that means you can't fit every single thing on one rack and need a second row or a shelf underneath for smaller items.
Think about the wall above and below the rack too, not just the rack itself. A small shed usually has a few feet of dead wall space above head height that never gets used for anything, and that's a fine spot for a second rack holding stuff you grab only a couple times a year, seed starting trays, stakes, a spare hose nozzle. Underneath, a narrow shelf or a couple of bins on the floor can hold bagged soil amendments or fertilizer that never made sense hanging on a hook in the first place, which keeps those off the floor space you're trying to keep clear.
Step 4: Mount the rack level, then hang the heavy tools first
Use a level when you mark your final mounting holes, not just an eyeballed line. A rack that's even slightly off level becomes obvious fast once it's loaded, and tools will visibly lean or slide toward the low end. Mark your holes, drill your pilot holes into the studs you confirmed in step two, and mount the StoreYourBoard with the screws or lag bolts rated for the weight you're planning to hang. Once it's up, tug on it firmly before you load anything, if it flexes or shifts at all, stop and check your anchoring before going further.
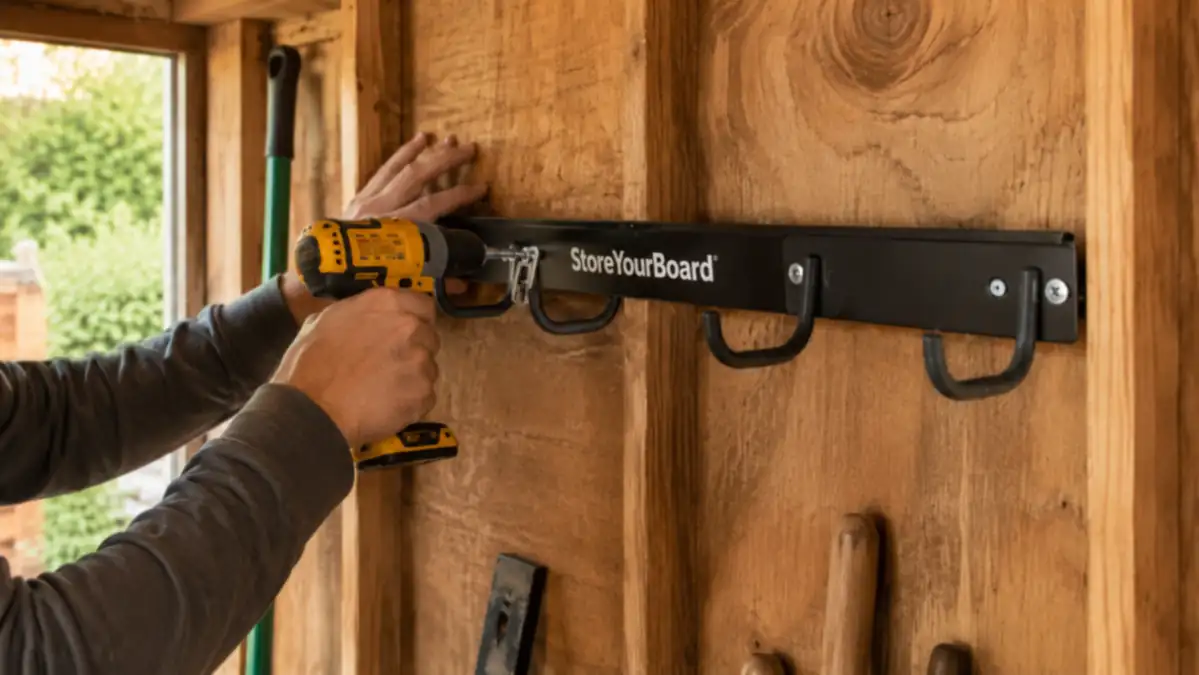
Hang your heaviest tools first, and hang them closest to the studs and mounting points rather than out at the far end of the rack. A full-size shovel, a garden fork, and a heavy-duty rake carry most of the weight your rack has to support, so getting those settled first also gives you a much better sense of how much space is actually left for everything else, before you start committing spots to smaller tools.
Step 5: Keep bladed and powered tools out of reach, and finish the floor
If there's any chance a child could get into your shed, hand pruners, loppers, hedge shears, and anything powered or battery operated need to go on the highest hooks the rack has, well above a kid's reach even standing on a step stool or an overturned bucket. I keep my pruners and my cordless tools on the top row for exactly this reason, and I keep the shed door latched, not just closed, when I'm not actively in there. A wall-mount rack keeps blades up off the floor where a small hand could grab one by the working end instead of the handle, which is one of the quieter safety benefits of getting tools off the ground in the first place.
Once the StoreYourBoard is loaded, look at what's left on the floor. In most small sheds, that should now be limited to bulkier items that never made sense on a wall rack to begin with, bags of soil, a wheelbarrow, a hose reel. If you're still tripping over a hose every time you walk in, that's worth solving separately, and I found a hose reorganized around the same rack system I review here made a bigger dent in the floor clutter than I expected. Sweep the floor, put down a cheap rubber mat if the ground stays damp, and resist the urge to immediately start piling new things onto the newly clear floor space. That empty spot is doing you a favor.
What Else Helps
A wall-mount rack solves the big problem, tools leaning and piling on the floor, but a few smaller habits keep a small shed organized past the first month. I wipe down metal tool heads before hanging them back up if they've been used in wet soil, since hanging a damp, dirty tool against a wall is a slow way to invite rust onto the rack hooks themselves. I also do a quick five minute reset every couple of weekends, just walking the shed and putting back anything that migrated out of place, rather than waiting for the whole thing to slide back into chaos before I deal with it.
It also helps to rotate what's front and center with the season. In spring I move trowels, seed packets, and stakes to the easiest hooks to reach, and by fall those slide over to make room for the leaf rake and a tarp. It only takes a few minutes to swap things around, and it means the tools I'm actually reaching for on a given weekend are never the ones buried behind something I won't touch again until next year.
If you're still deciding whether a wall-mount rack is worth the project in the first place, I laid out the specific reasons it made a bigger difference than I expected in 10 reasons a wall-mount tool rack saves space, including a couple of things I didn't think would matter until they did, like how much faster I could find a specific tool without digging through a pile first.
A small shed doesn't need to be bigger. It needs its tools off the floor and onto the one wall you've been ignoring.
Ready to get your own shed off the floor?
However cluttered your shed looks right now, the fix usually isn't more square footage, it's getting tools up onto a wall where they belong. The StoreYourBoard rack's rubber coated hooks and 250 pound capacity gave me enough room for a full set of garden tools on one wall, with room to spare for the odds and ends that used to end up on the floor.
Amazon Check Today's Price on Amazon →